terça-feira, 25 de junho de 2013

London's transportation system...

Hello all,

As you probably don't know, I live in London (the UK one) and I must admit it is the city with the best transportation system in the world. Ok, I haven't been in every country or major city of this planet, but I've been to a few and the only system that gets close is the SMRT in Singapore.

The best thing about the London public transportation system, or TfL as is known in the Uk is its Countdown service (click the link for an explanation).
To use this service all you have to do is go to http://countdown.tfl.gov.uk/, search for the bus stop you need and you'll get a prediction of when the next bus will roll by based on the GPS position of the buses.

This is all good and great... and not really a problem if you have one of the many mobile apps or if you keep a computer always on in your place, but for most people having to go online to check the website or go to the app... might be troublesome.

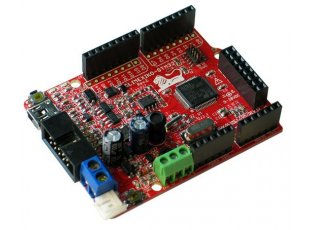
Wouldn't it be better if we could have an LCD board like this:

Bus stop arrival times
in your hallway or next to your front door so you could always see the next bus coming? Obviously, this is too big for that, but if it could be done with a little LCD display it would be great, right?

That's what I thought... and ended up with this: 


My own personal Bus Arrival notification panel. 

One interesting thing about it is that since a couple of months back, the Thames Clipper River Service is also included in countdown as you can see in the video. 

My original idea was to use an LCD shield and use the keys to create a config menu, however I realized (the hard way) that my Ethernet shield is not compatible with the LCD shield (the backlight control pin is use in the SPI communication) and so had to build my own lcd shield for Arduino... and boy, is that weird spacing a headache or what??? 

Next I'll post more details about this... and the library used... so stay tuned. 

sábado, 22 de junho de 2013

Maple from LeafLabs (an STM32 ARM board in an Arduino footprint).

Hello,

I'm here to talk about the Maple from LeafLabs.com, since some of my latest work has been on this board and processor.

The Maple

As you probably know Arduino launched Arduino Due with an ARM processor a couple of months ago and since then it's been the talk of the interwebs, however, the Maple beat the Due to market by quite a long time.

The big difference is that the chip used in the Maple is from ST whilst the one in the Due is from ATMEL. So the tools to use on them are different and therefor the Arduino IDE can't be used with the Maple.

This being said, the Maple does have its own IDE which is based off of the Arduino's, so it's not like you need to learn a completely new environment to work with it.

Starting with the Maple can be a bit daunting. The amount of peripherals and configuration possibilities is almost endless (in comparison with a normal AVR arduino at least), but there's examples to get you started.
One thing to have in mind is voltages, the Maple works with 3,3V and not all the pins support 5V.

There's also a Maple Mini...

Maple Mini
And a pretty good clone from Olimex.

Olimexino-STM32

I personally use the Olimexino (mainly for the RTC crystal and SD card slot), but my code libraries work on all the boards shown here.

The downside of the Maple is that some of the Arduino shields (the latest Ethernet shields, for example) aren't compatible because the Maple doesn't have the AVR ICSP connector through which shields that use SPI are connected. But, don't despair... the pluses of the board make up for this little problem. 

So far I created the RTC support for the Maple with the help of some forum members and also an encoder interface so you can use the Maple's counters as an incremental encoder interface. :) 


quarta-feira, 12 de junho de 2013

How to run your arduino chip without an external crystal...

Hello again...

I am a sucker for clocks... from my Tissot down to the Real Time Counter implementations in microcontrollers I love them all. :)

So, and considering that the standard AVR chips inside the Arduinos have an adapted Timer (2, in case you're wondering) for the Real Time Counter application, I decided to have a go at creating an RTC library for Arduinos. And then you hit a brick wall...

Arduinos have an SMD oscillator, so desoldering, finding and soldering a 32kHz crystal would be out of the question. But... I'm no stranger to AVR chips, so I went ahead and developed the library for an old ATmega16 that I had lying around.

After that was finished I came back to the Arduino and decided to use a standalone "Arduino" chip so I could connect the 32 kHz instead of the 16MHz oscillator normally present in the board.

First, and since this is an old Arduino chip, I had to use a 16MHz crystal and capacitors to be able to communicate to the device. You can see how to hook it up here.

However, Arduinos don't have an internal 8MHz crystal version (sadly), so I had to create my own board...
After playing with the fuse calculator online, and finally realizing which bootloader to use, Google spit out this to me.

So all you need to do, is really to copy the file to your hardware folder (create one if you don't have one), inside the Arduino sketch folder and you're good to go.

Then all you need to do is:

- Download the ArduinoISP sketch to your Arduino.
- Connect it as the drawing above.
- Select one of the newly added boards (that match your bare chip).
- Click on Tools -> Burn Bootloader.

Now, the IDE won't respond for some time, but you should see the LEDs on the board flicker as the bootloader is sent to the chip.

And that's it! Chip prepared for an RTC sketch.

For you to download your sketches you'll need something like this or this or this:


Remember, the RX from the FTDI chip goes to the TX of the Arduino and vice-versa.

And that's it. 
All you need then is to download your program and it'll work, slower, but without many external parts. 

See you next time. :)


segunda-feira, 3 de junho de 2013

It starts...

This blog comes as a place for me to share some of my knowledge in electronics and microcontrollers. With the popularity of Arduino, I see that a lot of people find it hard to start or to solve some of their problems with the Arduino and that is what I'll try to focus on.

The blog will have tutorials on some electronic stuff and especially microcontrollers. I'm very used to AVRs and am dipping my toes now on the ARM architecture with the STM32 line of chips and will use this to share my stuff with you.

I'll also put up some links for libraries made by me. :)